How to Build an Outdoor Wood Fired Sauna: A Complete Guide
If you’re exploring how to build an outdoor wood-fired sauna, you’ll love the unmatched relaxation it offers. The natural, radiant heat from a wood-fired sauna feels softer and more soothing than electric or gas alternatives—making it a favorite among sauna purists.
Choosing wood as a heat source connects your sauna to traditional sauna practices. It offers numerous benefits, including improved blood circulation and greater affordability.
These portable saunas, often made of wood, can be visually appealing as they blend seamlessly into outdoor settings, providing a tranquil nature retreat. In this guide, we will explore essential steps, considerations, and tips to help you design and build your own wood-fired sauna.
Planning Your Sauna Project
Learning to build an outdoor wood-fired sauna is a highly rewarding project, though it requires careful planning and consideration. This initial phase is crucial, as it ensures your DIY outdoor wood-fired sauna functions properly and blends harmoniously with its natural surroundings.
To kick things off, here are essential factors to consider:
- Ensure you have level ground and sufficient space for a structure at least six feet wide and seven feet high.
- Materials: Choose 100% clear-grain wood for the interior. Avoid knots to ensure durability.
- Do not skimp on insulation, especially if you live in colder climates, where 6-inch studs and proper insulation can make a significant difference.
- Plan for adequate ventilation. In particular, windows should be at least 24 inches from the stove.
Determine Optimal Sauna Location
Choosing the best location for your sauna may be the most important decision you make. Consider how sun exposure and wind direction can enhance your sauna experience. Proximity to bodies of water will facilitate wood management and cleaning routines.
Also, consider the surrounding landscape for privacy and aesthetics to create a place of peace and restoration. Construction and maintenance accessibility are essential, so plan for continuous access to your sauna for upkeep.
Finally, check local zoning regulations to avoid problems in the future.
Check Local Building Codes
Here’s how to verify compliance:
- Research regulations that may affect your project.
- Obtain necessary permits to avoid penalties.
- Consult local authorities to ensure you meet all requirements.
Plan for Wood Storage
No one wants a sauna that doesn’t heat well! Effective wood storage is a key to your sauna’s performance. Consider these best practices:
- Keep firewood dry and accessible.
- Locate storage away from sauna access points.
- Protect stored wood from pests and moisture.
- Keep the wood storage area as dry and ventilated as possible to avoid the wood decaying.
Design Considerations
When learning how to build an outdoor wood-fired sauna, intentional design makes all the difference. Every element – from materials to layout – must work together to create a space that’s safe, functional, and deeply relaxing. Here are the essential design considerations for your perfect wood-fired sauna:
- Size and layout
- Material selection
- Ventilation options
- Seating arrangement
- Natural light integration
Striking a balance between movement efficiency and visual beauty can make the pedestrian environment both functional and inviting.
Comfort & Function
A comfortable sauna that meets the user’s needs can be achieved through careful design considerations. For example, using natural materials enhances the aesthetic while providing superior insulation. Design decisions significantly affect the overall experience, so consider how each component interacts with the others.
An open, welcoming floor plan encourages guests to explore and gather.
Sauna Size and Layout
Determining the appropriate size involves several factors:
- Number of users
- Available outdoor space
- Heating efficiency
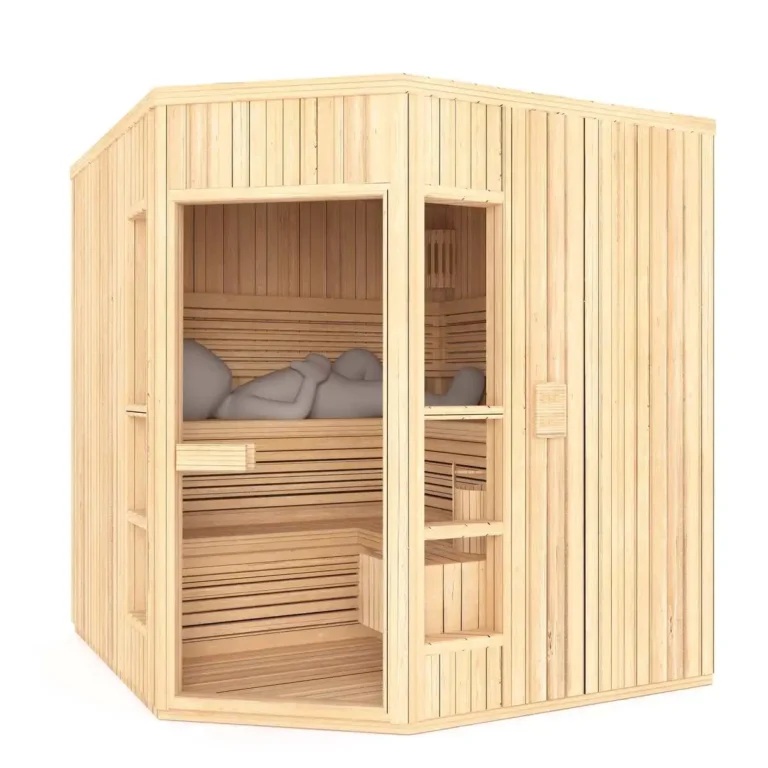
An arrangement that accommodates two to three visitors allows them to engage with each other, relax, and feel at ease. Design for at least 24 inches of bench length per person to provide sufficient seating.
When planning to build an outdoor wood-fired sauna, ceiling height is crucial for proper steam retention. Aim for at least 7 feet to create an authentic, enveloping heat experience. Remember that size directly affects your wood-fired sauna’s efficiency – larger spaces require more energy to reach and maintain ideal temperatures, so balance comfort with practical heating considerations.
Choose a Design Style
Popular design styles include:
- Traditional Finnish
- Modern minimalist
- Rustic cabin
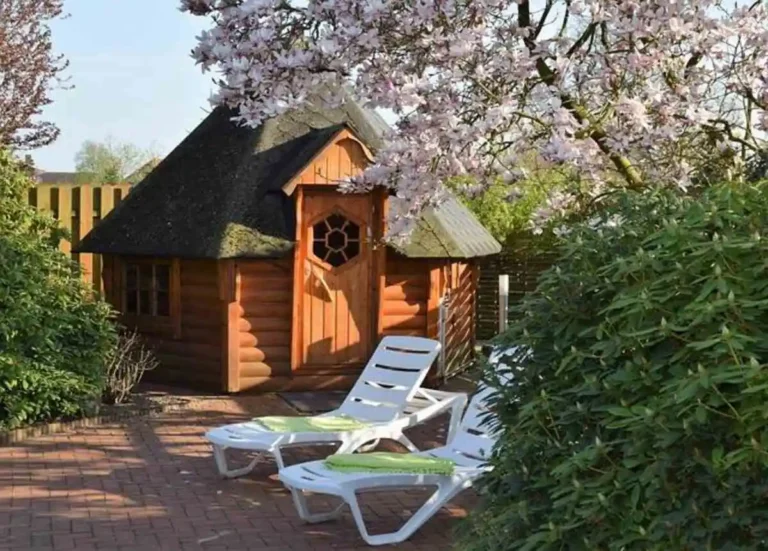
Each style will directly reflect the client’s personal taste and further enhance the existing outdoor aesthetics. Finally, consider how the sauna’s design will complement your home and garden.
While traditional designs highlight the beauty of natural wood, modern styles often take the opposite approach, emphasising geometric lines and innovative materials. Choosing the most appropriate style will make your outdoor area both inviting and functional.
Balance Tradition and Modernity
Including traditional cues enriches modern designs. Elements such as natural wood benches and stone accents can help alleviate the dissonance between contemporary design and historic surroundings.
Innovations such as state-of-the-art heating systems increase comfort while preserving the past. Customising your sauna allows it to better reflect your individual preferences.
Select Durable Materials
Selecting durable materials
When planning to build an outdoor wood-fired sauna that will last for generations, material selection is absolutely critical. The right choices will ensure your wood-fired sauna remains safe, efficient, and durable for years. This guide provides essential tips for selecting materials for outdoor sauna construction, helping you choose options that best suit your needs and climate conditions.
- Garden ideas courtesy of chelseamarketgarden.com
- Untreated cedar or spruce wood
- Insulation (fiberglass batts or dense pack mineral wool)
- Durable material for the foundation—like concrete or treated wood
- Weather-resistant siding (composite, treated wood, or cement board)
- Galvanized nails and screws
Choosing durable, weather-resistant materials is important to ensure your work will last. If not constructed using appropriate materials, moisture exposure can cause rot and significant structural deterioration.
For example, utilizing treated wood or composite materials for exterior trim and siding can go a long way towards increasing the longevity of your sauna experience.
Wood Selection for Structure
- Select Durable Materials Spruce treeBeetle kill pine (cheap in Colorado)
Cedar and spruce are good species to consider, in large part because they’re naturally resistant to moisture. Choosing kiln-dried wood for long-lasting stability with the lowest possible risk of warping is essential.
With each wood type adding its own unique aroma, this will enrich the sauna experience. Be sure to use quality materials, especially when sourcing wood, which should be sourced from responsible suppliers.
Foundation Material Options
- Foundation Materials:
- Concrete
- Treated wooden beams
Durable materials provide a strong foundation that structural integrity springs from. Concrete may provide a hardcore base of stability, but if budget is a priority, wooden foundations can save costs.
The type of foundation affects insulation and moisture management, so proper drainage is important to avoid water damage.
Weather-Resistant Siding Choices
- Siding Materials:
- Treated wood
- Composite materials
Using treated wood or composite siding will improve the durability of these materials. Detailed attention to installation details will minimize moisture infiltration and routine maintenance will maximize siding performance.
Other durable materials I operated on 1×6 tongue and groove siding with 2″ galvanized box nails for a solid hold.
Foundation and Flooring
A good foundation and flooring system is essential for your long-lasting, beautiful outdoor wood-fired sauna. When properly constructed, a solid foundation will provide comfort and durability for many years. Here are a few steps to help you get started.
Prepare the Ground
- Clear the site of debris and vegetation.
- Level the ground, removing any high spots.
- Compact the soil to create a stable base.
- Ensure proper drainage away from the sauna.
Start by preparing a level area where you will construct the sauna. Clearing plants, rocks, and other debris now helps prevent future plant growth that could damage your structure. Ensuring the base is perfectly level is important.
Even a small bump can cause serious structural problems later. Once cleared, compact the soil with a hand tamper or mechanical tamper to create a solid base. This treatment not only helps the sauna support its own weight but also protects it.
Drainage is very important. Ensure the ground slopes away from the sauna so that water does not collect near it.
Build a Solid Foundation
- Dig footings based on sauna dimensions.
- Pour concrete footings for stability.
- Ensure the foundation is level and square.
- Keep the foundation elevated to avoid moisture.
- Reinforce the foundation in frost-prone areas.
For a solid, permanent foundation, start by digging footings according to the size of your sauna. Pour concrete into these holes and allow it to cure sufficiently to set properly. To prevent the structure from twisting or warping over time, the foundation must be level and square.
Proper drainage prevents moisture from seeping underneath, which is essential in humid climates. If you live in a region with severe frost, ensure your foundation is reinforced.
Install Flooring Joists
- Gather treated lumber for joists.
- Space joists 16 inches apart for load distribution.
- Check that joists are level and anchored securely.
- Use insulated materials to retain heat.
- Allow ventilation beneath the flooring.
Use treated timber for floor joists and space them correctly; 16 inches on centre is typical. Ensuring they are properly levelled and anchored is important for weight distribution.
By using insulated materials to retain heat in your sauna, you will be able to enjoy it fully. Constant air movement beneath the flooring materials prevents moisture accumulation, eliminating conditions in which mould can thrive.
Lay the Decking
- Select moisture-resistant decking materials.
- Lay decking boards with 1/4 inch spacing for drainage.
- Secure boards to the joists.
- Choose aesthetically pleasing materials.
- Maintain the decking regularly to prevent rot.
During deck installation, choose moisture-resistant decking materials that will hold up to the sauna’s environment. Be sure to space the boards a minimum of 1/4 inch apart to create drainage as necessary.
Either way, periodic upkeep is key to maintaining the wood’s integrity and aesthetic beauty.
Framing the Sauna
Proper framing forms the backbone of any quality outdoor wood-fired sauna, providing the structural integrity required for safety and performance. When learning how to build an outdoor wood-fired sauna, remember that this step determines your sauna’s ability to retain heat and withstand years of use in all seasons. The correct framework ensures proper insulation while creating the ideal sauna environment you wish to achieve.
Essential Tools and Materials
- Tape measure
- Level
- Hammer
- Circular saw
- Drill and drill bits
- Wood screws
- Insulated wall panels
- Bracing materials
Sticking to a clear framing plan is essential for maintaining good framing. Having an accurate plan allows you to avoid costly errors and ensures everything is the correct size. Assembling the sauna according to the dimensioned drawings is crucial.
Verify that the walls are plumb and square as you build. Check vertical and horizontal alignment with a level. This step is very important, as any misalignment at this stage can cause significant problems later.
Material and framing choices significantly affect insulation values and heat retention. Insulated wall panels improve energy efficiency, making it easier to keep your sauna warm and comfortable.
A simple, well-considered design with thicker walls will further enhance comfort, allowing for larger, more comfortable spaces. Place windows and doors in your blueprint carefully to avoid compressing or stretching, which can damage your insulation.
Build the Walls
- Measure and cut wall panels.
- Assemble panels on the ground.
- Lift and fasten panels to the frame.
- Install additional insulation as needed.
- Ensure all connections are secure.
The insulated wall panels allow for maximum energy efficiency. Make sure joints are aligned and tight across components to ensure no heat escapes.
In simplest terms, your wall thickness determines how well your sauna will hold heat, dictating the quality of your sauna experience.
Assemble the Frame
- Lay out the base.
- Cut and position vertical supports.
- Attach horizontal beams.
- Securely fasten all components.
- Check for squareness.
The use of quality fasteners and building for longevity is essential. Ensure your frame is both square and level as you assemble it. Even slight variations can prevent your sauna from performing properly.
Check frequently for any weak points that may develop during construction.
Ensure Structural Integrity
- Check for square and level.
- Reinforce corners and joints.
- Assess for any misalignment.
- Inspect for signs of weakness.
- Schedule regular inspections.
Reinforcing corners and joints with a wooden dowel or other stabilizing material is good practice. A well-built structure is the foundation for ensuring the long-term value and functionality of your sauna.
Regular inspections go a long way in keeping that integrity intact.
Sheathing and Siding
Sheathing and siding are important considerations when building an outdoor wood-fired sauna. In addition to providing structural support, they improve insulation and protect the building from the elements. Using the correct materials and proper installation methods will help ensure durability and longevity..
Install Plywood Sheathing
- Measure and cut plywood sheets to fit the frame.
- Position the sheets against the studs, ensuring tight fits.
- Attach with roofing screws or siding nails, working from the center outwards.
- Check alignment with a level to ensure a true surface.
- Seal edges with a good quality, type exterior-grade caulk to avoid moisture infiltration.
Choosing premium plywood makes a difference. It also offers excellent resistance to moisture exposure and thermal cycling. Proper fastening and alignment not only look sharp; they also provide structural reinforcement and energy insulation.
Sealing the edges is important because it prevents moisture from entering, which can ruin the sauna.
Attach Exterior Siding
- Choose siding material based on aesthetics and functional requirements.
- Cut siding boards to length before installation.
- Install the first board, ensuring it’s level.
- Overlap the boards, following the manufacturer’s guidelines.
- Secure with weather-resistant fasteners, checking for tight seals.
The type of siding you choose will affect both insulation and appearance equally. Weather-resistant fasteners enhance long-term durability against the damaging effects of wind, moisture, and other severe conditions.
Overlapping boards ensure water runoff, preventing damage. Regular maintenance is essential to protect against weathering, keeping the sauna attractive and functional for many years.
Seal Against the Elements
- Choose quality sealants designed for exterior use.
- Apply sealant around all joints, edges, and seams.
- Inspect seals regularly for wear and effectiveness.
- Check sealing around windows and doors thoroughly.
- Reapply sealant as needed to maintain energy efficiency.
Good sealing protects your sauna from moisture damage and allows it to operate more efficiently. Annual inspections ensure that the seals are in good condition, saving you from costly repairs.
Producing accurate, complete seals around all openings is the key to achieving full performance.
Roof Construction
Essential materials for roof construction include:
- Lumber for joists
- Plywood or OSB sheathing
- Roofing material (shingles, metal, or tiles)
- Quality sealants
- Weatherproofing membrane
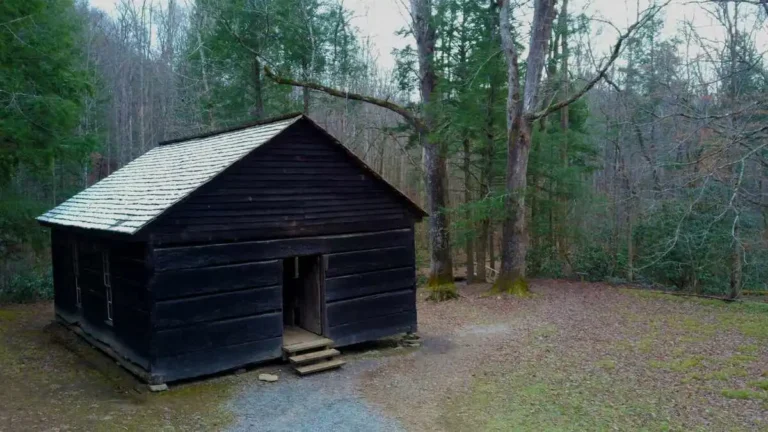
Choosing a roof shape or style that promotes drainage to the perimeter is important, especially in areas with heavy water runoff – a benefit immediately provided by a sloped roof. Ensure the roof can withstand the elements.
Ensure it is securely attached to the sauna frame, as this stability is necessary to endure unpredictable storms. The choice of roofing materials, including colour, can significantly affect insulation and heat retention. Shingles provide better insulation, while materials such as metal can reflect heat.
Add Roof Joists
To add roof joists, follow these steps:
- Measure and cut lumber to size.
- Position the joists according to your design.
- Securely anchor each joist using brackets.
- Check for level alignment.
It is essential to space your joists correctly so that the load is distributed evenly. This prevents sagging or structural failure. Ensure the joists are level and securely fastened to provide the deck with sufficient strength.
As with roof trusses, the material used for joists affects overall roof strength. Wood is the most common, but engineered materials such as CLT or glu-lam offer greater durability. An effective ventilation system is crucial to prevent moisture accumulation, which could otherwise create conditions for mould growth.
Choose Roofing Material
Popular roofing materials for saunas include:
- Asphalt shingles
- Metal roofing
- Wooden shingles
Every roofing material has its advantages and disadvantages. Additionally, asphalt shingles are generally the most affordable roofing option on the market, but they typically do not last as long as metal.
Metal roofing offers durability and longevity, withstanding high temperatures, while wooden shingles provide beauty and flexibility. Regardless of which roofing material you choose, the key to maximising the lifespan of your roof is consistent maintenance.
Ensure Proper Sealing
To ensure proper sealing of the roof:
- Inspect seams and edges.
- Apply quality sealants.
- Regularly check for wear and tear.
This is one of the most important factors – and causes – of leaks. Keeping all the seals regularly inspected can keep them effective and make your roof more energy efficient.
Proper flashing and sealing around roof penetrations, including those added later after construction, is critical in preventing unwanted water intrusion.
Door and Window Construction
When learning how to build an outdoor wood-fired sauna, pay special attention to door and window construction. Optimal sizing—large enough for safety but small enough for efficiency—ensures proper heat retention while adding visual appeal and necessary ventilation to your wood-fired sauna experience
Here’s 3 steps to tackle this essential transition stage.
Essential Materials
- Solid wood or insulated materials
- Energy-efficient windows (preferably double-glazed)
- Weather stripping
- Hinges and locks
- Insulation foam
- Caulking material
Selecting high-quality, energy-efficient windows is essential for maintaining insulation. Double-glazed windows prevent heat loss, making the sauna easy to heat and maintain at the desired temperature. Proper sealing to protect against air drafts is equally important.
Installing a layer of weather stripping on the exterior frames blocks cold air and prevents heat from escaping. The placement of doors and windows significantly affects the ability to ventilate effectively. Thoughtful placement provides more opportunities for natural ventilation, keeping spaces healthy and pleasant.
Proper maintenance is essential to ensure they function optimally. Keep windows clean and inspect seals regularly to prevent air leakage.
Build a Sturdy Door
- Measure and cut the door frame
- Assemble the door using solid wood
- Install hinges and a locking mechanism
- Seal edges with weather stripping
- Test for alignment and fit
Employing solid wood or insulated materials addresses the durability of the door. Sharp alignment and weather tight sealing plays an important role in avoiding exterior drafts. The door design should lend itself to retaining heat, but still be easily operable.
An easily accessible child-proof locking mechanism is greatly important.
Frame and Install Windows
- Measure and cut the window frames
- Install double-glazed windows
- Seal around the frames with caulk
- Secure the windows in place
- Regularly clean and inspect
Double-glazed or triple-glazed windows improve insulation and good installation with sealing avoids drafts. The arrangement of windows should optimize passive solar heating, natural day lighting and cross ventilation.
Without regular cleaning, window and door upkeep can leave a hazy view and lead to frustration.
Prioritize Ventilation
- Identify vent locations
- Install vents in the upper and lower sections
- Ensure vents are unobstructed
- Regularly inspect for blockages
- Adjust vent positions as needed
Airflow is essential for comfort in a sauna. Properly positioned soffit and ridge vents improve airflow, reducing humidity and keeping moisture under control. Ensuring that vents and other openings are unobstructed enhances sauna enjoyment.
Interior Design and Features
Setting up a welcoming, functional interior space for your outdoor wood-fired sauna goes a long way toward maximizing your sauna experience. Important design features are key to how you and your visitors use and appreciate this space.
Consider the following:
- Comfortable seating options
- Effective lighting
- Quality interior finishes
- Personal touches for uniqueness
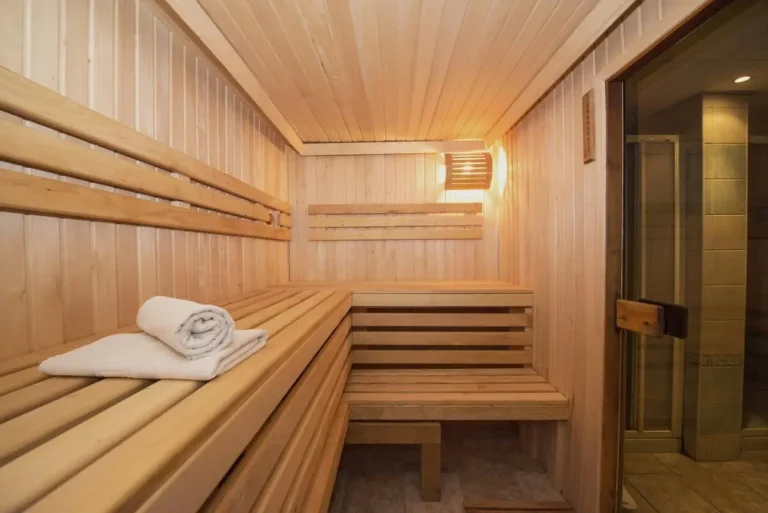
Bench Construction and Placement
When constructing sauna benches, you should follow these steps:
- Measure and plan your bench layout.
- Choose heat-resistant wood.
- Cut the wood to size.
- Assemble the benches securely.
- Anchor the benches to the floor.
Using heat-resistant materials is crucial in order to provide the safest and longest lasting installation possible. For safety while using the sauna, the benches could be anchored firmly to the floor.
Proper bench design is crucial when learning how to build an outdoor wood-fired sauna. The recommended 18-inch height and 24-inch width create optimal comfort, while regular maintenance keeps your benches looking great and functioning perfectly in your wood-fired sauna environment
Choose Interior Wood
Recommended wood types include:
- Cedar
- Hemlock
- Spruce
Using woods such as cedar provides a wonderful fragrance, taking the sauna experience to an even more enjoyable level. Moisture-resistant materials increase durability and reduce maintenance requirements.
A variety of woods enhance the sauna’s ambiance and aroma, creating a peaceful environment. Using wood sourced from sustainable suppliers ensures your sauna is as good for the planet as it is for you.
Add Finishing Touches
Enhancing your sauna experience involves thoughtful finishing touches. Consider:
- Installing proper lighting
- Adding towel racks and hooks
- Choosing soothing colors
Well-chosen lighting creates an inviting atmosphere, and accessories including towel bars and shelves will help maintain a clutter-free environment.
These color choices play a big role in the room’s atmosphere, making it a tranquil retreat or energizing getaway. Add artwork, plants, or other personal touches to make your sauna truly your own.
Building the Wood-Burning System
Your wood-fired heater determines the quality of heat and humidity in your sauna. When building an outdoor wood-fired sauna, proper heater selection and installation ensure authentic steam sessions and safe operation for years to come. This essential component requires special attention during construction.
Select a Wood Burning Stove
Consider these essential components for your wood-burning sauna system:
- A high-efficiency wood-burning stove
- Proper chimney and flue systems
- Heat-resistant materials for surrounding structures
- Safe clearance zones for installation
Selecting a high-efficiency stove is an important step. It ensures maximum heat output while consuming less wood, creating a sauna that is both cost-effective and eco-friendly.
The design, size, and heating capacity of the stove must match the size and layout of your sauna. For example, a larger sauna requires a more powerful stove to maintain the desired temperature.
Stove efficiency is evaluated and measured using the BTU rating, which indicates the maximum amount of heat the stove can produce. A well-designed stove not only provides comfortable, efficient heat but also serves as the heart of your sauna and a key design feature.
Ensuring your installation meets all local safety requirements is essential to prevent serious safety risks.
Install Stove Safely
Safety considerations upon installation are of utmost importance. Follow these steps for a secure setup:
- Read and understand the manufacturer’s installation guidelines.
- Ensure proper clearance from combustible materials.
- Install a chimney system that meets local codes.
Correct clearance helps prevent fire hazards and ensures that there is enough space for air circulation. You want your chimney to vent smoke outside and not allow smoke to build up in your sauna.
Continuous monitoring is required to ensure safe operation and to detect potentially dangerous conditions before they result in failure.
Design for Efficient Heat Distribution
Smooth, even heat distribution makes all the difference between a good sauna and a great sauna. Consider these strategies:
- Position the stove to promote even heat flow.
- Use reflective surfaces to boost heat retention.
- Maintain appropriate ventilation for consistent temperatures.
Correct positioning of stove allows heat to penetrate all areas of the sauna. Adding in reflective materials can help to keep the heat in, creating a more pleasant and beneficial session.
Routine checks of temperature variances keep everyone in a cozy space.
Insulation and Ventilation
Proper insulation and ventilation are essential when building an outdoor wood-fired sauna. High-quality insulation maintains consistent heat, while effective ventilation manages moisture. Together, they create the perfect, comfortable environment your sauna deserves. Follow these guidelines to implement both systems correctly in your outdoor wood-fired sauna project.
1. Insulate Walls and Roof
- Measure the dimensions of your walls and roof.
- Select high-quality insulation material.
- Cut insulation to fit snugly between studs and rafters.
- Seal around insulation with caulk to prevent drafts.
- Cover with a vapor barrier before finishing with wood.
Using quality materials greatly helps your sauna stay as hot as possible. Proper sealing methods are essential to prevent cold air leaks from undermining your efforts.
Insulation thickness is crucial for retaining heat. In fact, using slightly thicker insulation can reduce heating times by up to 67%.
2. Choose Insulation Materials
- Fiberglass
- Mineral wool
- Rigid foam board
- Spray foam insulation
Both fibreglass and mineral wool insulation offer excellent thermal performance and are proven choices. Select moisture-resistant materials, as saunas are very humid environments.
Choosing the best insulation for your sauna will significantly improve the overall efficiency of your oasis. Therefore, it is important to obtain insulation from reliable suppliers.
3. Install Ventilation System
- Determine the best location for vents.
- Whenever possible, install intake vents low to the ground and exhaust vents near the ceiling.
- Ensure ducts are clear and adequately sized.
- Test airflow after installation.
If not managed properly, airflow can create detrimental effects on comfort and performance. Correctly located vents promote the best air movement possible, keeping harmful humidity levels in check.
4. Ensure Proper Airflow
- Regularly check vent positions.
- Monitor humidity with a hygrometer.
- Keep vents unobstructed and clean.
At the bottom are strategically placed vents that improve cross-ventilation, making the sauna an even more enjoyable way to detox. Keeping your vents clean, unobstructed, and functional is key to ensuring you receive the full health benefits of your sauna.
Conclusion
Building your own outdoor wood-fired sauna creates a rewarding retreat for relaxation and wellbeing. The key to success lies in careful planning, durable materials, and precise construction – especially for insulation and framing. By following proper techniques for how to build an outdoor wood-fired sauna, you’ll create a sanctuary that lasts for years to come.
Design a cosy woodland-inspired interior or a luxurious spa retreat that reflects your aesthetic. Ensure public safety throughout the construction of the wood-burning system. Every detail matters, from the flooring to the ceiling.
Your efforts will be rewarded with every relaxing moment in your beautiful new sauna. Take the first step today. Your perfect outdoor wood-fired sauna begins here.